Follow Me On Social Media!
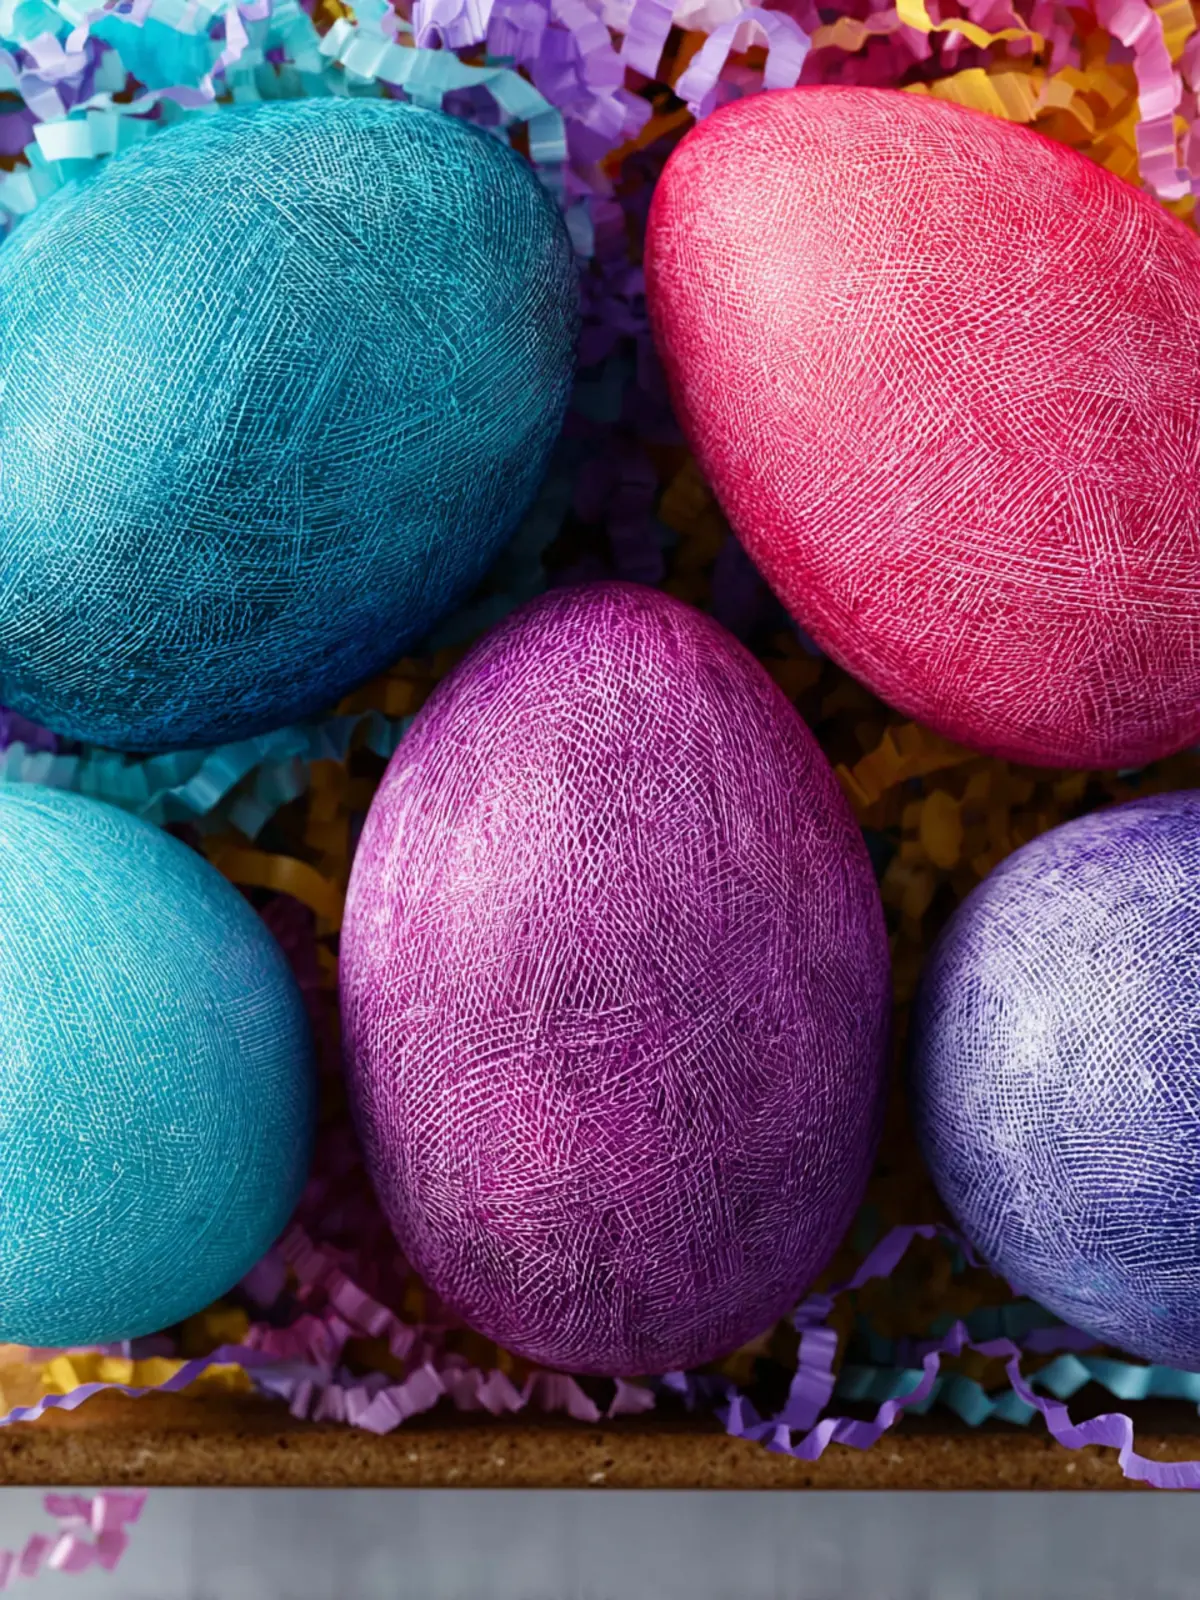
Fabric-Textured Easter Eggs: Easy, Fun, and Stunning Crafts!
Introduction to Fabric-Textured Easter Eggs
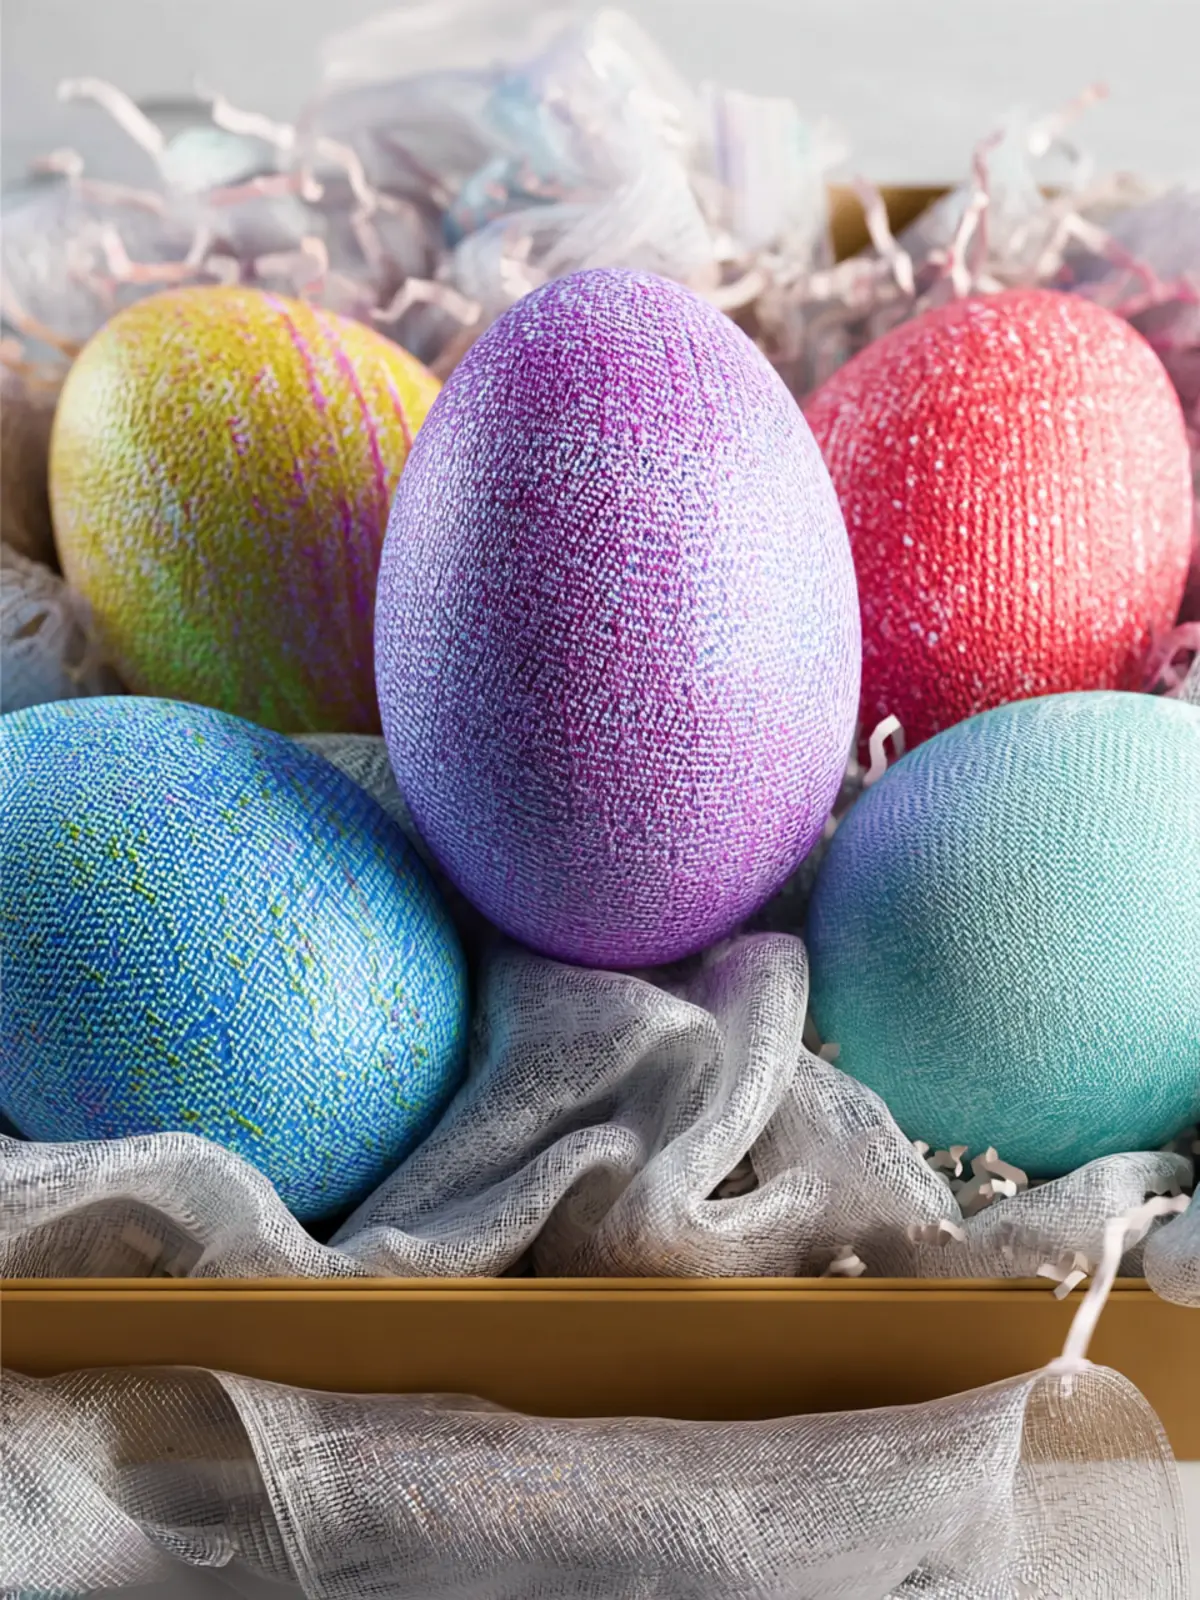
Fabric-textured Easter eggs bring a fresh twist to traditional egg decorating, making them a delightful addition to your springtime festivities. Imagine a sunny afternoon where you’re gathered with friends and family, creating your own unique works of art. The joy of working with vibrant fabric scraps transforms ordinary eggs into stunning eye-catching decor, each telling its own story through texture and color.
What makes Fabric-Textured Easter Eggs so special?
The magic of fabric-textured Easter eggs lies not just in their appearance but in the hands-on experience of crafting them. This creative project is about transforming simple egg forms into beautiful treasures that reflect your personal style. Here’s what makes them exceptional:
-
Creative Freedom: The beauty of using fabric is that you can select patterns and colors that resonate with you or match your home decor. From florals to polka dots, the combinations are endless, allowing for your personality to shine through every piece.
-
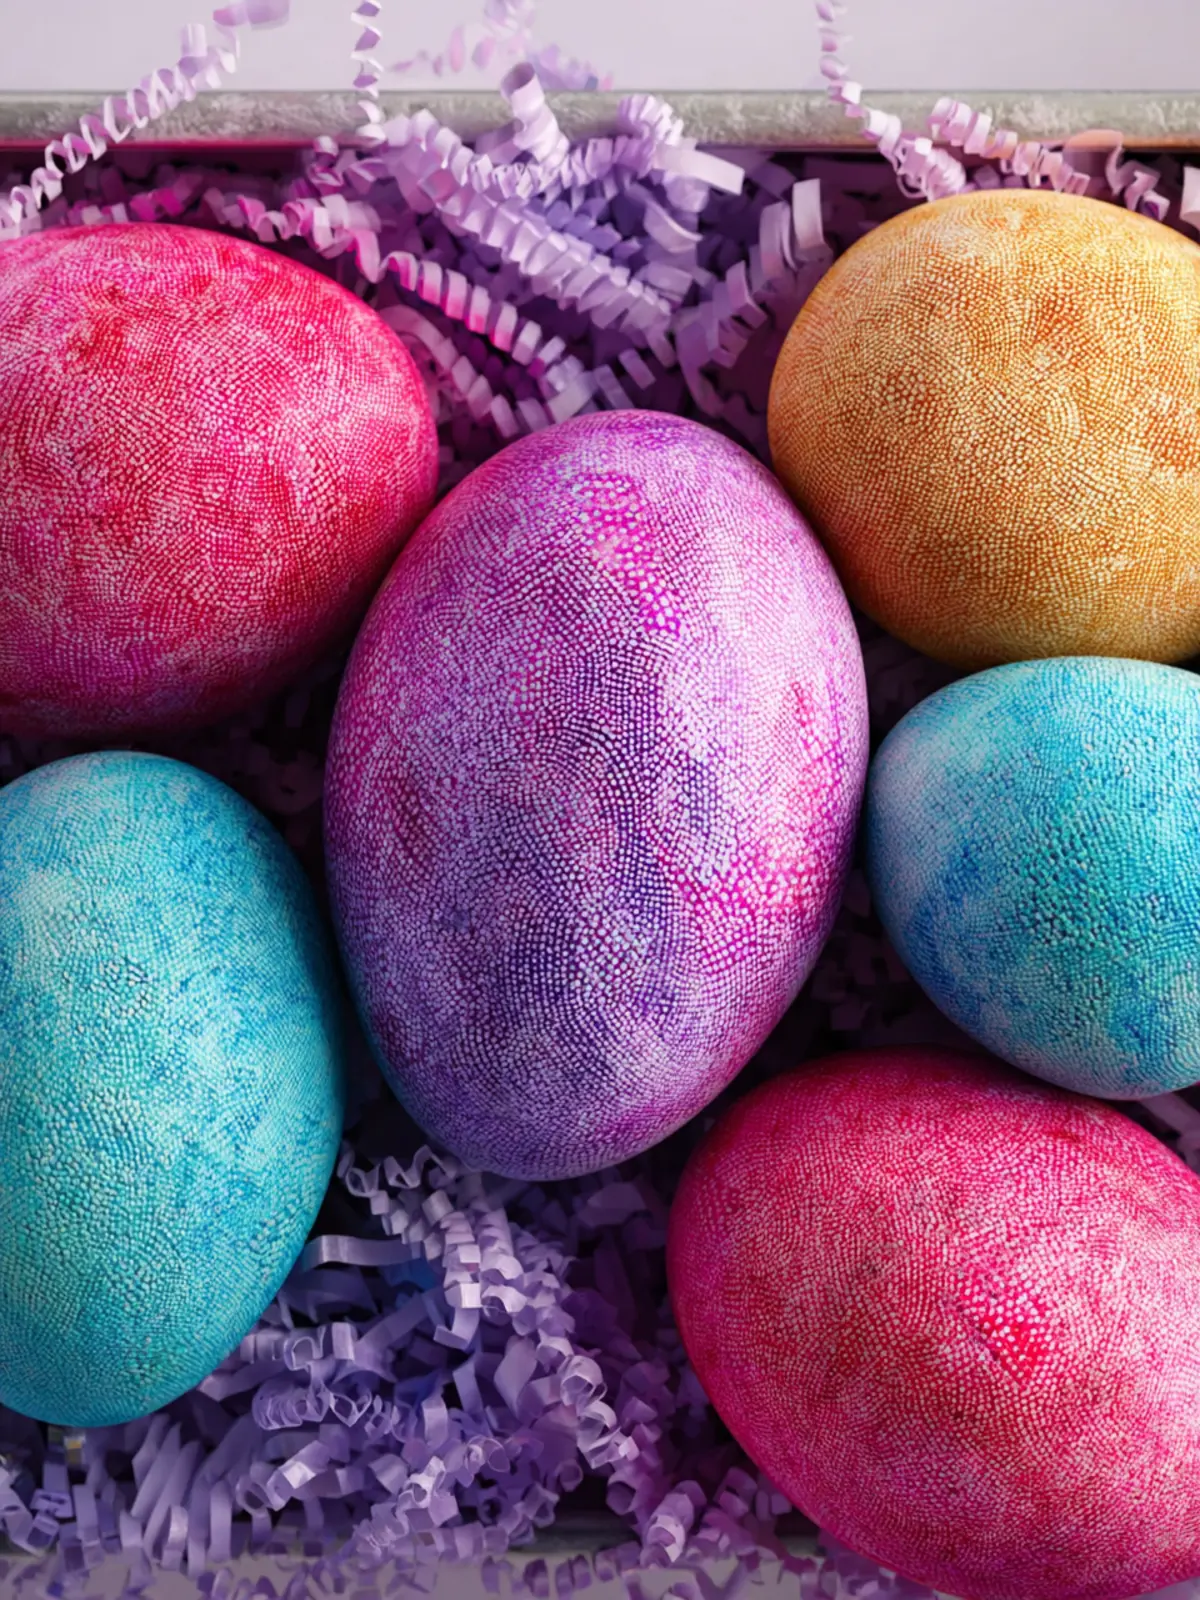
Textural Appeal: These eggs aren’t just pretty; they’re interesting to touch as well. The smoothness of the egg combined with the varied textures of fabric creates a sensory experience that captivates both children and adults alike.
-
Sustainability: By using leftover fabric scraps, you’re not only creating unique art pieces but also making eco-friendly choices. It’s a fantastic way to repurpose material that would otherwise go to waste.
-
Family Fun Activity: This project is perfect for all ages. Whether you’re a seasoned decorator or trying your hand at crafting for the first time, fabric-textured Easter eggs invite everyone to join in the fun. Picture laughter filling the room as you all strategize how to arrange your colorful fabrics.
Creating fabric-textured Easter eggs is more than just a craft; it’s an opportunity to foster creativity and share cherished moments with loved ones. Dive into the world of textile art this Easter, and let each egg convey a piece of your heart!
Key Ingredients for Fabric-Textured Easter Eggs
Fabric: The star of your fabric-textured Easter eggs is the fabric itself. I recommend using a variety of cotton and linen materials in different patterns and colors. This not only adds visual interest but also gives each egg a unique feel. If you’re feeling crafty, you can even repurpose leftover fabric scraps from past projects!
Mod Podge: This versatile adhesive acts as both a glue and a sealer. When you apply it, it creates a durable finish that protects your fabric. A matte or glossy finish depends on your aesthetic preference, but the matte generally works nicely for a soft look.
Eggshells: Opt for real eggshells—their natural shape is perfect for this craft. Make sure to pierce and empty them gently for a lightweight and easy-to-decorate base. Don’t worry if they break during the process; sometimes, a little imperfection adds charm!
Scissors: A good pair of fabric scissors is essential for cutting your material into the right shapes. Dull scissors can lead to frayed edges and frustration, so keep them sharp for clean cuts.
String or Ribbon: Use string or ribbon to provide a finishing touch to your fabric-textured Easter eggs. They can be used to hang the eggs or as decorative embellishments. Choose colors that complement or contrast with the fabric for a delightful pop!
Why You’ll Love This Recipe
Creating fabric-textured Easter eggs is more than just a fun craft—it’s a journey into a world where creativity meets tradition. Picture this: vibrant, homemade Easter eggs that not only look stunning but also bear the personal touch of your handiwork. Each egg tells a story, adorned with unique fabric patterns that reflect your style and celebration.
-
Ease of Preparation: This recipe is refreshingly simple, requiring just a handful of materials and minimal time. Whether you’re juggling work and social commitments or simply looking for a delightful evening activity, this is the perfect weekend project.
-
Perfect for All Ages: Crafting fabric-textured Easter eggs is an engaging way to bring family and friends together, regardless of age. Children will love choosing their favorite fabrics, while adults can enjoy the meditative process of gluing and layering.
-
Sustainable and Cost-Effective: By using scraps of fabric, this recipe is not only eco-friendly but also budget-conscious. It’s a wonderful way to breathe new life into small pieces that might otherwise go unused.
Whether you choose to decorate your home or create cherished gifts, these delightful eggs are bound to enchant everyone around you. Dive into the creativity, and you’ll find that this simple craft becomes a treasured tradition!
Variations on Fabric-Textured Easter Eggs
Creating delightful fabric-textured Easter eggs isn’t just a seasonal craft; it’s an artistic journey that can take many forms. If you’re feeling adventurous, there are several variations that you can experiment with to personalize your Easter celebration.
Different Fabric Choices
Try using various types of fabric for unique textures and finishes:
- Cotton: This is a classic choice, great for easy manipulation and vibrant patterns.
- Lace: For a delicate and elegant look, lace overlays can add a whimsical touch.
- Felt: Great for a tactile experience, felt can be easily cut into shapes and layered for a chunky texture.
Color and Pattern Ideas
Color selection can transform your eggs:
- Pastels: Think soft blues, pinks, and yellows for a traditional Easter feel.
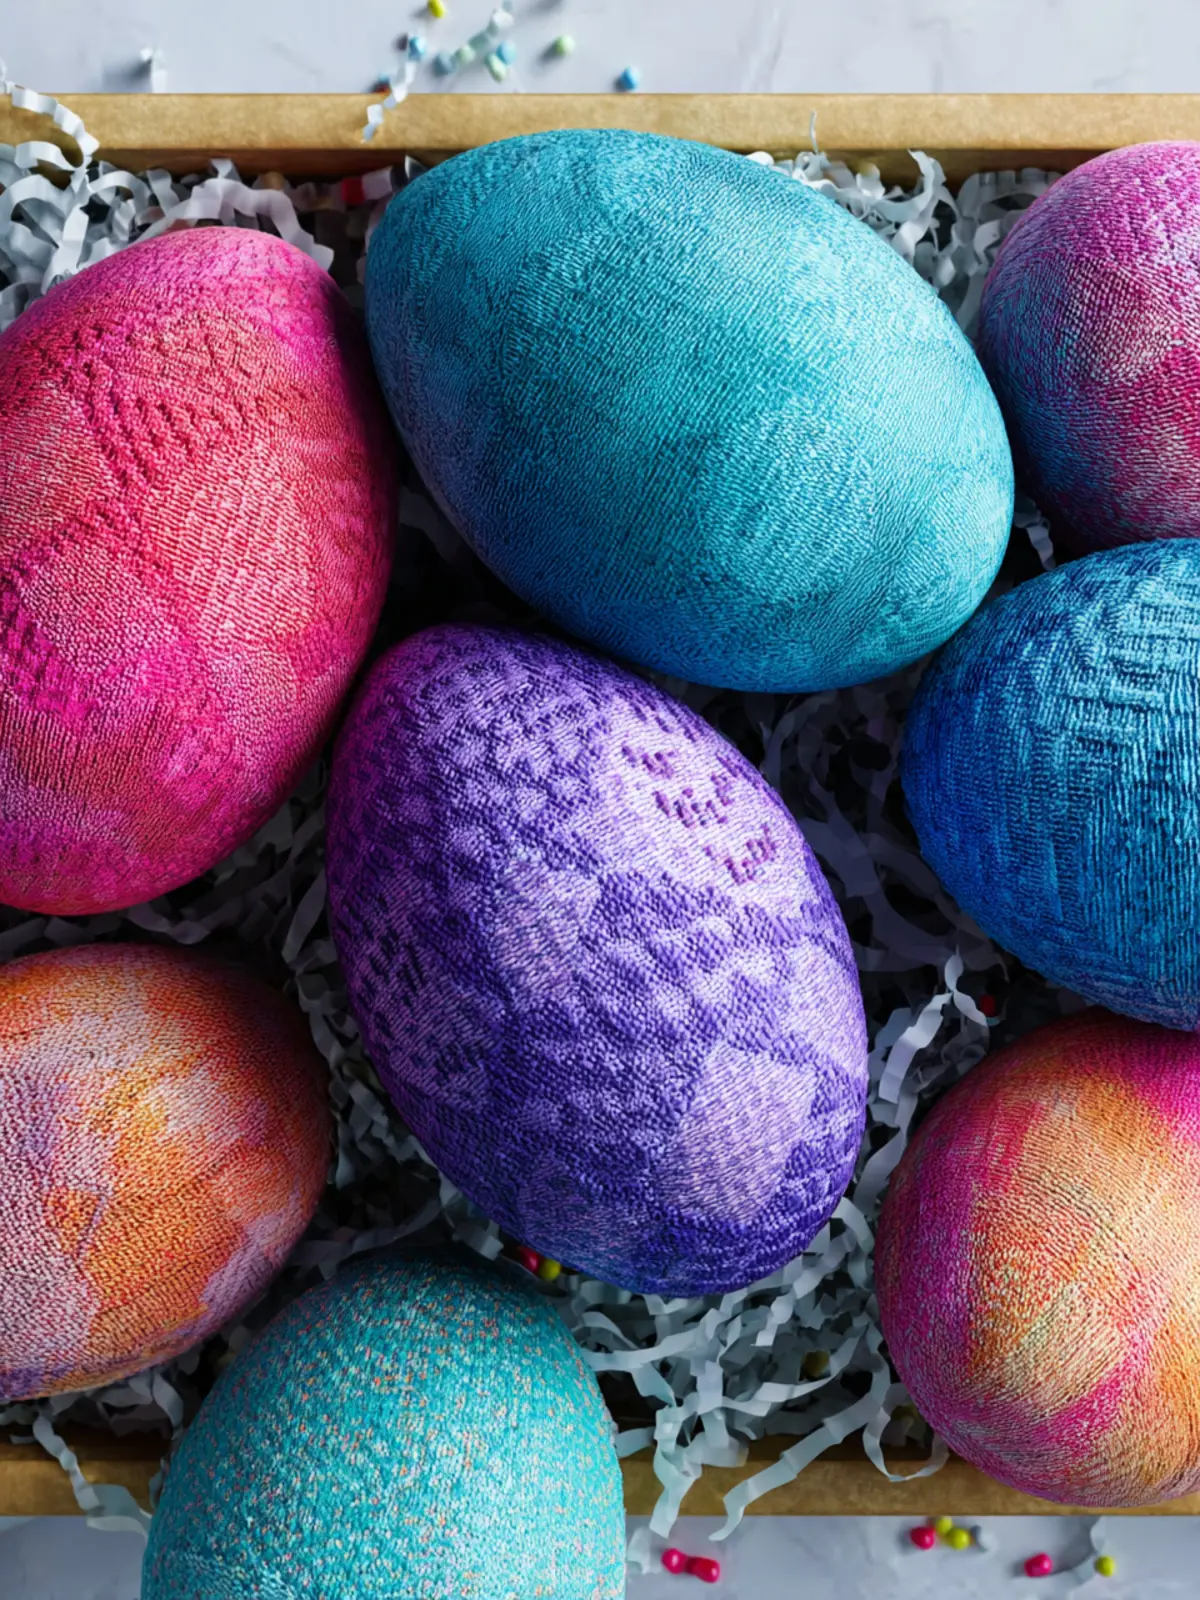
- Bold and Bright: Electric colors can make your eggs stand out and add a modern twist.
- Patterns: Consider using printed fabric or combining different prints for an eclectic look.
Embellishments and Finishing Touches
Add some flair with embellishments:
- Ribbons and Twine: Wrapping your eggs with colorful ribbons can create an eye-catching design.
- Buttons and Beads: Glue on some decorative buttons or beads for added texture and interest.
- Stickers: For a quick and easy decoration, use stickers that fit your theme.
With these variations, your fabric-textured Easter eggs will not only celebrate the beauty of the season, but also showcase your creativity and personal style!
Cooking Tips and Notes for Fabric-Textured Easter Eggs
Creating fabric-textured Easter eggs is not just about dyeing; it’s about infusing personality into each egg. With a bit of creativity, you can turn your kitchen into a mini craft studio. Here are some insightful tips to enhance your egg-decorating journey.
Choosing the Right Fabric
- Fabric Selection: Opt for lightweight fabrics like cotton or linen. These hold color beautifully without adding bulk. You can even repurpose scrap pieces from old clothes for a personalized touch.
- Pattern Play: Patterns can really make your eggs pop. Stripes, florals, or even polka dots can add a charming aesthetic. Don’t hesitate to experiment!
Preparation Techniques
- Egg Preparation: Make sure your eggs are clean and dry. This preparation ensures the dye adheres properly and the fabric texture remains bold.
- Cutting Fabric: I recommend cutting your fabric into strips or patches small enough to wrap around the eggs but large enough to overlay. It can be a fun use of fabric scissors!
Dye Application
- Soaking Time: Allow the fabric to soak in dye longer than standard methods call for. The deeper saturation will give your eggs a vivid look.
- Layering Colors: For a more vibrant finish, consider layering multiple colors. Let one layer dry before applying the next.
Finishing Touches
- Seal Your Work: Consider a sealant to protect your designs. A simple spray can keep your creations intact for years to come.
- Display Wisely: When showcasing your fabric-textured Easter eggs, choose a decorative basket or vase. Displaying them creatively can make your decorations the centerpiece of any celebration.
These tips should help you craft unique and personal fabric-textured Easter eggs that your family will cherish for years to come! Happy decorating!
Serving Suggestions for Fabric-Textured Easter Eggs
When you create fabric-textured Easter eggs, you’re not just making a craft; you’re crafting memories that can spark joy and nostalgia. These delightful decorations can transform your home into a whimsical wonderland, perfect for family gatherings or festive brunches.
Displaying the Easter Eggs
To showcase your fabric-textured Easter eggs, consider using a beautiful dish or decorative bowl. A rustic woven basket or a glass cloche can create an inviting centerpiece on your dining table, drawing guests in to admire your handiwork. You might also arrange them in an artistic cluster on a mantel, mixing in some spring flowers for added charm.
Creative Uses for Easter Decorations
Beyond simply being eye-catching decorations, think about how you could incorporate these eggs into your Easter festivities:
- Table Settings: Place an egg at each place setting as a personalized touch for your guests.
- Hanging Decor: Use thin ribbons to create unique hanging ornaments. Whether draped across a window or nestled in a doorway, they add festive flair.
- Gift-Wrapping Accents: Attach one of your creatively designed eggs to an Easter basket or gift for a memorable finishing touch.
By integrating your fabric-textured Easter eggs into various aspects of your holiday celebrations, you create a joyful atmosphere that truly captures the essence of Easter.
Time Breakdown for Fabric-Textured Easter Eggs
Creating fabric-textured Easter eggs is a delightful way to infuse creativity and personality into your Easter celebrations. Let’s break down the time you’ll need to craft these beautiful decorations.
Preparation time
Setting up your workspace and gathering all the necessary materials takes about 15-20 minutes. You’ll want to make sure you have all your supplies on hand, including fabric, glue, and eggs.
Dyeing time
Once your eggs are prepared, dyeing them will take approximately 30 minutes. This is a great time to enjoy your favorite tunes or a podcast while the colors set.
Total time
In total, you can expect to spend about 1 hour on making your fabric-textured Easter eggs, from preparation through to completion. It’s an enjoyable project that won’t take up your entire day, leaving room for other springtime activities!
Nutritional Facts for Fabric-Textured Easter Eggs
Creating fabric-textured Easter eggs is not only a delightful way to celebrate the season, but understanding their nutritional content adds another layer of appreciation. While these eggs focus on aesthetics rather than being edible, let’s imagine a playful twist on the traditional concept by discussing the hypothetical nutrition of a comparable edible version.
Calories
Each fabric-textured egg would likely contain minimal calories if crafted with ingredients like light icing or fruit. On average, an edible version may range around 70-100 calories per egg, making it a fun, guilt-free treat.
Protein
The protein content in these festive creations can vary. If you include egg whites or yogurt as part of your recipe, you could expect around 2-4 grams of protein per egg, enhancing both flavor and nutritional value without overwhelming the festive spirit.
Sodium
Sodium levels could be kept low, typically around 20-40 mg per egg, especially if you avoid added salts and stick with fresh ingredients. This makes them a healthy option for family festivities without compromising taste or fun.
By merging art and nutrition in our fabric-textured Easter eggs, we can celebrate the holiday in style!
FAQs about Fabric-Textured Easter Eggs
Creating fabric-textured Easter eggs is not just a craft; it’s a delightful way to celebrate the season with creativity. Here are some common questions that arise when diving into this enjoyable project.
Can I use natural dyes for Easter eggs?
Absolutely! Natural dyes are a fantastic option for fabric-textured Easter eggs. You can create beautiful hues using ingredients like beet juice for reds, turmeric for yellows, and spinach for greens. Not only do these dyes give your eggs a lovely, organic look, but they are also eco-friendly. Just keep in mind that natural dyes may yield softer, muted colors compared to synthetic dyes.
How long do dyed Easter eggs last?
The longevity of dyed Easter eggs largely depends on the dyeing method and storage conditions. Typically, freshly dyed eggs can be stored in the refrigerator for about one to two weeks. If you’re using natural dyes, it’s a good idea to consume the eggs within a week to ensure freshness. Remember, while the fabric texture looks fantastic, the eggs should be properly hard-boiled and cooled before dyeing for optimal longevity.
What types of fabric work best for this project?
When selecting fabric for fabric-textured Easter eggs, opt for lightweight materials like cotton or linen. These fabrics easily mold around the egg and allow for vibrant dye absorption. Avoid heavier fabrics, as they can be cumbersome and may not adhere well. A variety of patterns, such as florals or polka dots, can add an extra layer of charm to your creations. So, dig into your fabric stash or visit a local craft store to find the perfect pieces for your Easter egg design!
Conclusion on Fabric-Textured Easter Eggs
Crafting fabric-textured Easter eggs is not just a fun activity; it also brings a unique charm to your holiday celebrations. These eggs serve as a beautiful centerpiece and a creative way to involve family and friends. The process of layering fabric adds depth and texture, making each egg a mini work of art. Remember, the best part is the opportunity to personalize them according to your style or theme, transforming a simple decor item into something special. So gather your materials, unleash your creativity, and enjoy the delightful process of making these lovely Easter decorations!
Print
Hard-Boiled Eggs – Egg Dye
- Total Time: 30 minutes
- Yield: 6 eggs
- Diet: Vegetarian
Description
Learn how to dye hard-boiled eggs with food coloring for a vibrant and creative design.
Ingredients
- Eggs hard-boiled
- Food coloring as needed
- Fabric for wrapping
- Rubber band for securing the fabric
- Paper towel for drying
Instructions
- Prepare the Dye. Mix your egg dye according to the instructions. I used food coloring, which can be very strong, so a little goes a long way.
- Wrap the Egg. Tightly wrap a piece of fabric around your egg. Secure it at the top with a rubber band. Make sure the fabric is pressed snugly against the shell – it helps create a clearer design.
- Dye the Egg. Dip the wrapped egg fully into the dye. Leave it for about 30 seconds – or even less if the dye is strong. The longer it sits, the deeper the color and the more it may blur the design.
- Dry the Egg. Remove the egg and gently pat it dry with a paper towel. Let it sit for about 2 minutes.
- Unwrap. Carefully cut away the fabric wrap.
- Final Dry. Pat dry again and let the egg rest for 3 more minutes.
- Repeat and Enjoy! Keep going with as many eggs as you like.
Notes
- Food coloring can stain, so handle with care.
- Experiment with different fabrics for designs.
- Prep Time: 10 minutes
- Cook Time: 15 minutes
- Category: Dessert
- Method: Boiling
- Cuisine: American
Nutrition
- Serving Size: 1 egg
- Calories: 68
- Sugar: 0g
- Sodium: 62mg
- Fat: 5g
- Saturated Fat: 1.5g
- Unsaturated Fat: 3.5g
- Trans Fat: 0g
- Carbohydrates: 0g
- Fiber: 0g
- Protein: 6g
- Cholesterol: 186mg